


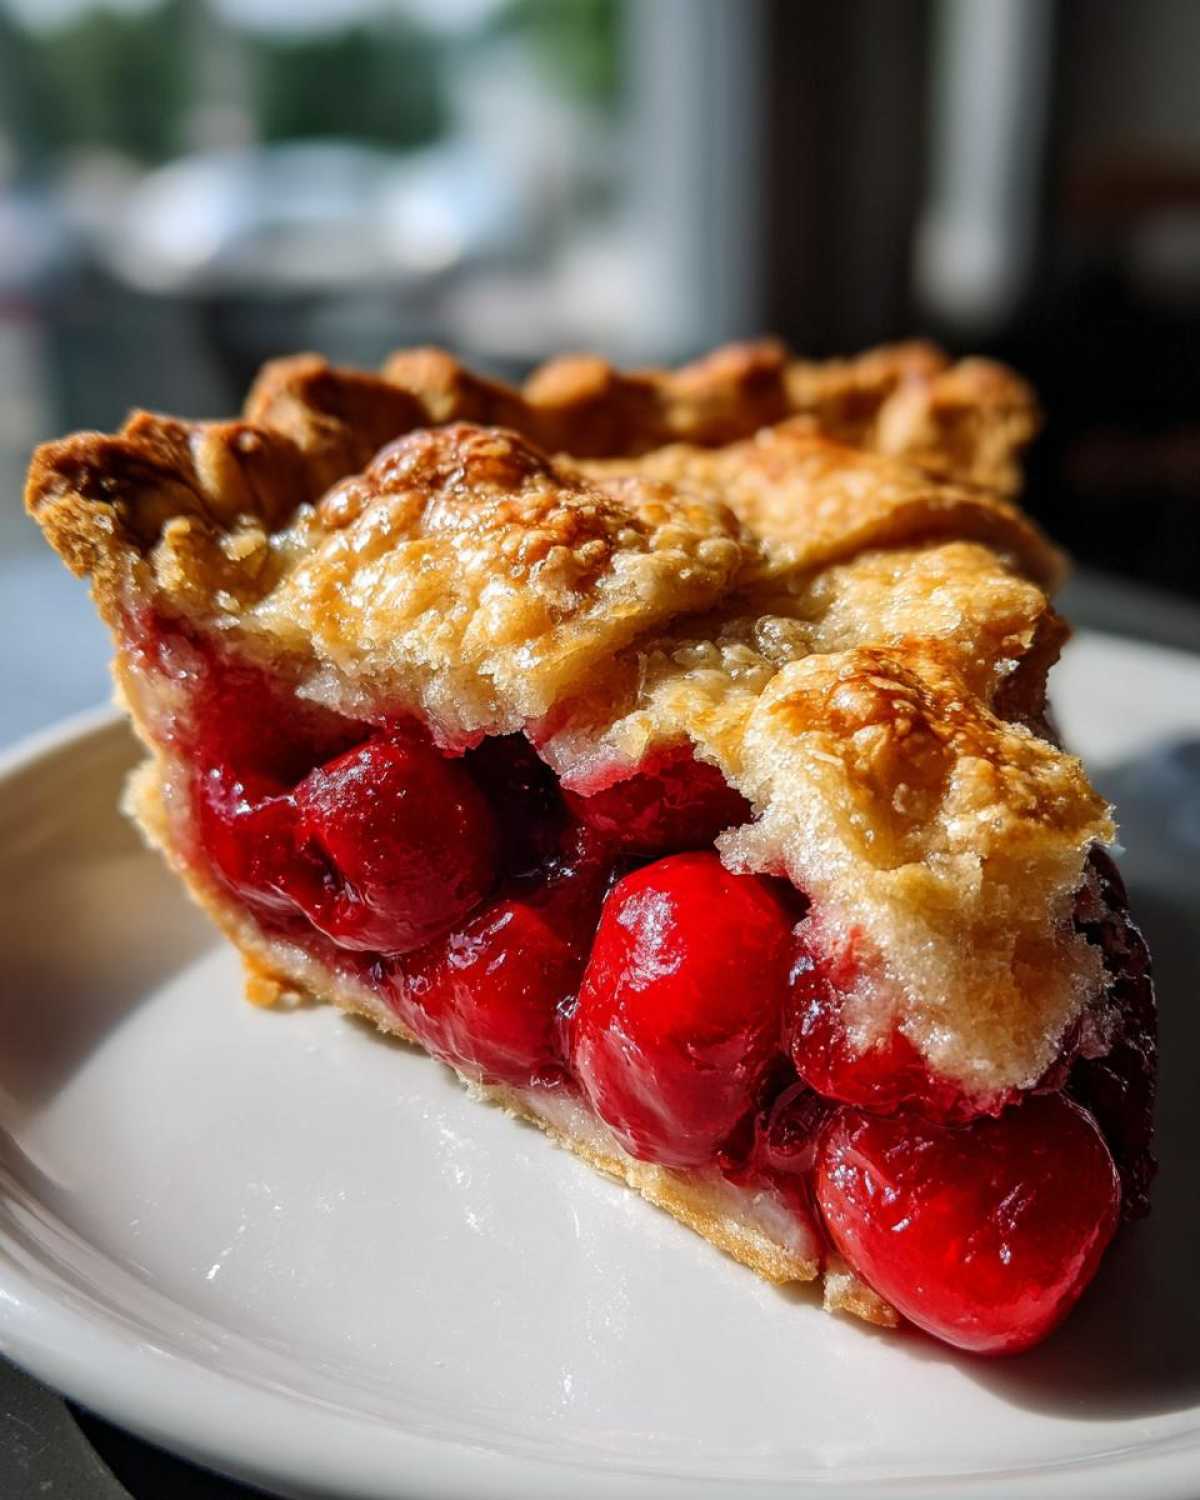
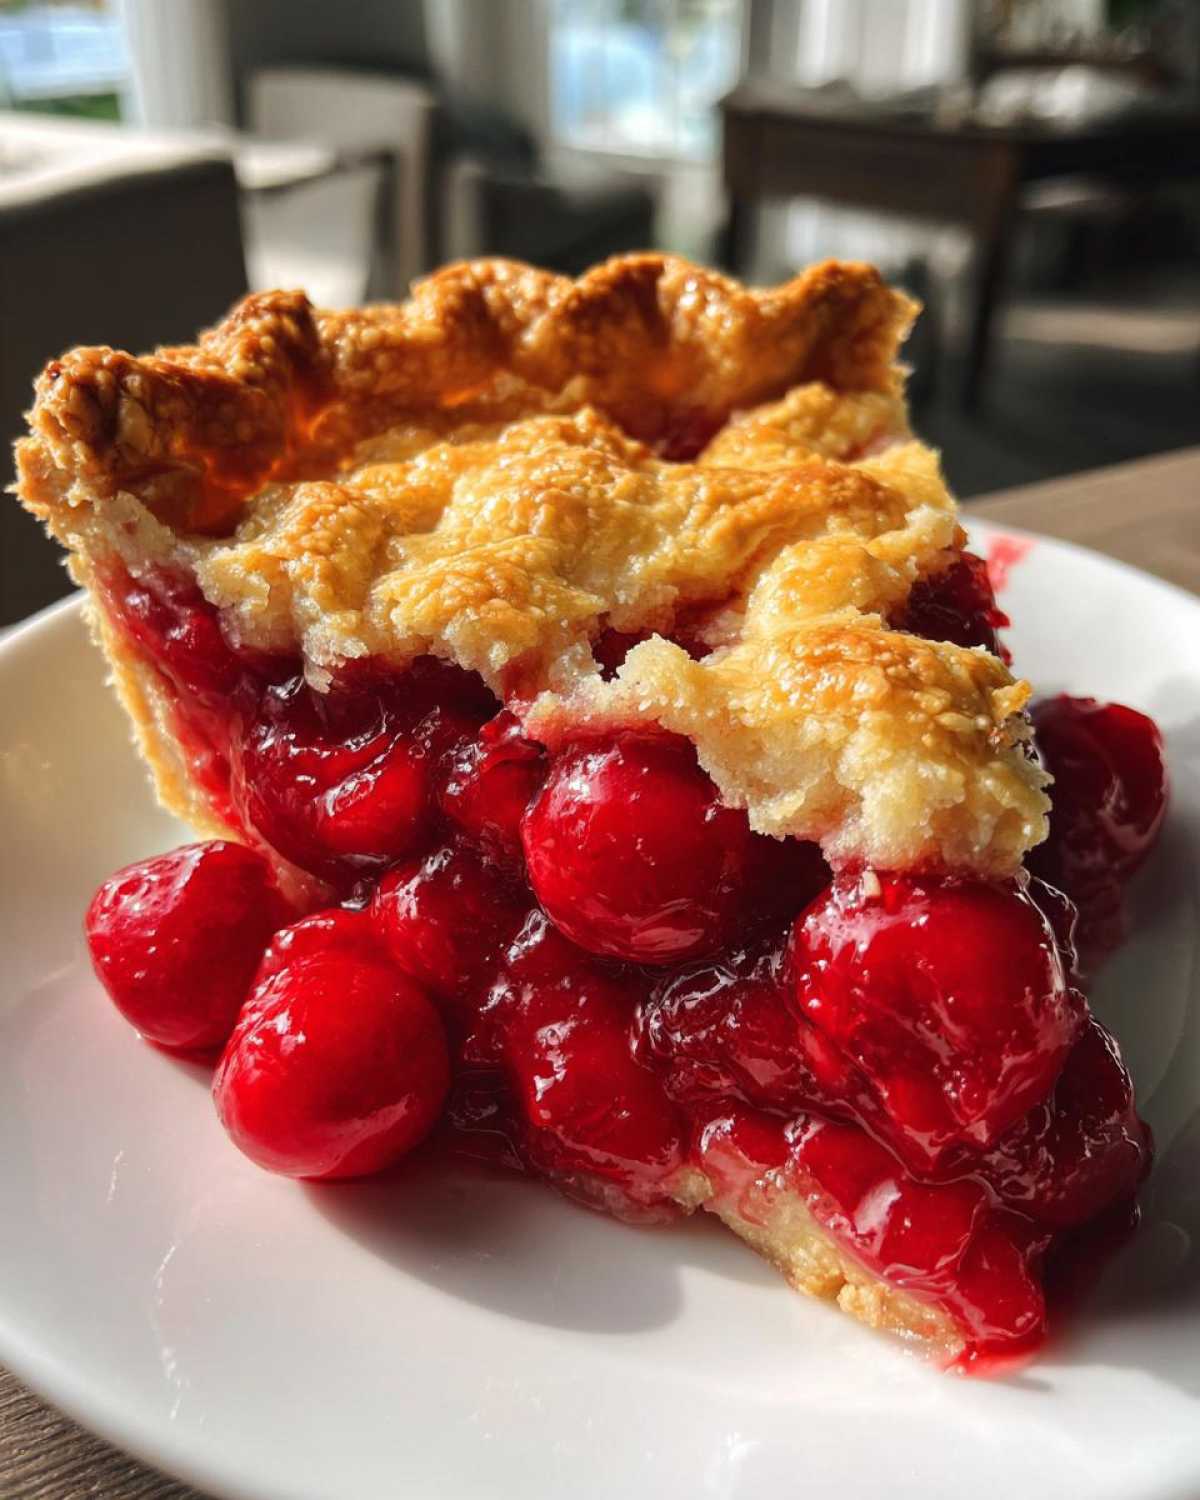
Ah, summer. Doesn’t it just call for baking? For me, nothing says warm weather and happy times quite like a slice of classic summer pie. And when I think of that, my mind immediately goes to the bright, sweet-tart goodness of a Homemade Cherry Pie (Classic Summer Pie). It’s a recipe that feels wrapped in sunshine and good memories.
Baking has always been my happy place. From learning those first secret recipes in my neighbor’s kitchen, I found such joy in creating something delicious to share. This classic summer pie is one of those recipes that just feels right. It’s simple, honest, and utterly comforting.
Making a homemade cherry pie isn’t just about following steps. It’s about the smell filling your kitchen, the anticipation as it bakes, and that first perfect bite. It reminds me of lazy afternoons and sharing sweet treats with loved ones.
I’m so excited to share my go-to cherry pie recipe with you. It’s a classic for a reason!
Why You’ll Love This Homemade Cherry Pie (Classic Summer Pie)
- It tastes just like summer! The sweet-tart cherries are simply the best.
- Making this homemade cherry pie is easier than you think.
- It brings back those wonderful feelings of classic comfort food.
- Sharing this classic summer pie with friends and family feels so good.
- It’s a perfect way to use fresh cherries when they are in season.
Equipment You Need for Homemade Cherry Pie (Classic Summer Pie)
Before we dive into the delicious part, let’s make sure you have everything ready. You won’t need anything fancy for this homemade cherry pie. Just a few kitchen basics will do!
- A 9-inch pie plate is a must.
- You’ll need a large bowl for mixing the filling.
- A baking sheet is helpful to catch any drips.
- Measuring cups and spoons are essential.
- A whisk or fork for the egg wash comes in handy.
Ingredients for Your Homemade Cherry Pie (Classic Summer Pie)
Gathering your ingredients is the first step to making this delightful classic summer pie. Using fresh, ripe cherries when you can makes a big difference in flavor. But don’t worry, frozen works beautifully too!
- 6 cups fresh or frozen cherries, pitted
- 3/4 cup granulated sugar
- 1/4 cup cornstarch
- 1 tablespoon lemon juice
- 1/2 teaspoon almond extract (optional, but I love the hint it adds!)
- 2 pre-made pie crusts or ingredients for a double crust pie (your favorite recipe!)
- 2 tablespoons unsalted butter, cut into small pieces
- 1 large egg, beaten (this is for our lovely egg wash)
- 1 tablespoon granulated sugar (to sprinkle on top for sparkle)
Preparing Your Homemade Cherry Pie (Classic Summer Pie)
Alright, let’s get our hands a little messy! Making this homemade cherry pie is a really rewarding process. Just follow these steps, and you’ll have a beautiful classic summer pie ready to enjoy.
First things first, preheat that oven. Get it nice and hot at 400°F (200°C). This initial heat helps set the crust nicely.
Getting Started with Your Fruit Filling
If you’re using frozen cherries, make sure they are thawed. Drain off any extra liquid. We don’t want a watery pie!
Grab a big bowl. Gently toss the cherries, sugar, cornstarch, and lemon juice together. If you’re using the almond extract, add it now. Stir it all up until the cherries are nicely coated. The cornstarch is our secret weapon for a thick filling.
Assembling the Homemade Cherry Pie (Classic Summer Pie)
Now for the fun part! Place one pie crust into your 9-inch pie plate. Press it gently into the bottom and up the sides. Pour that lovely cherry filling right on top.
Dot the filling with those small pieces of unsalted butter. This adds richness and helps the filling bubble beautifully.
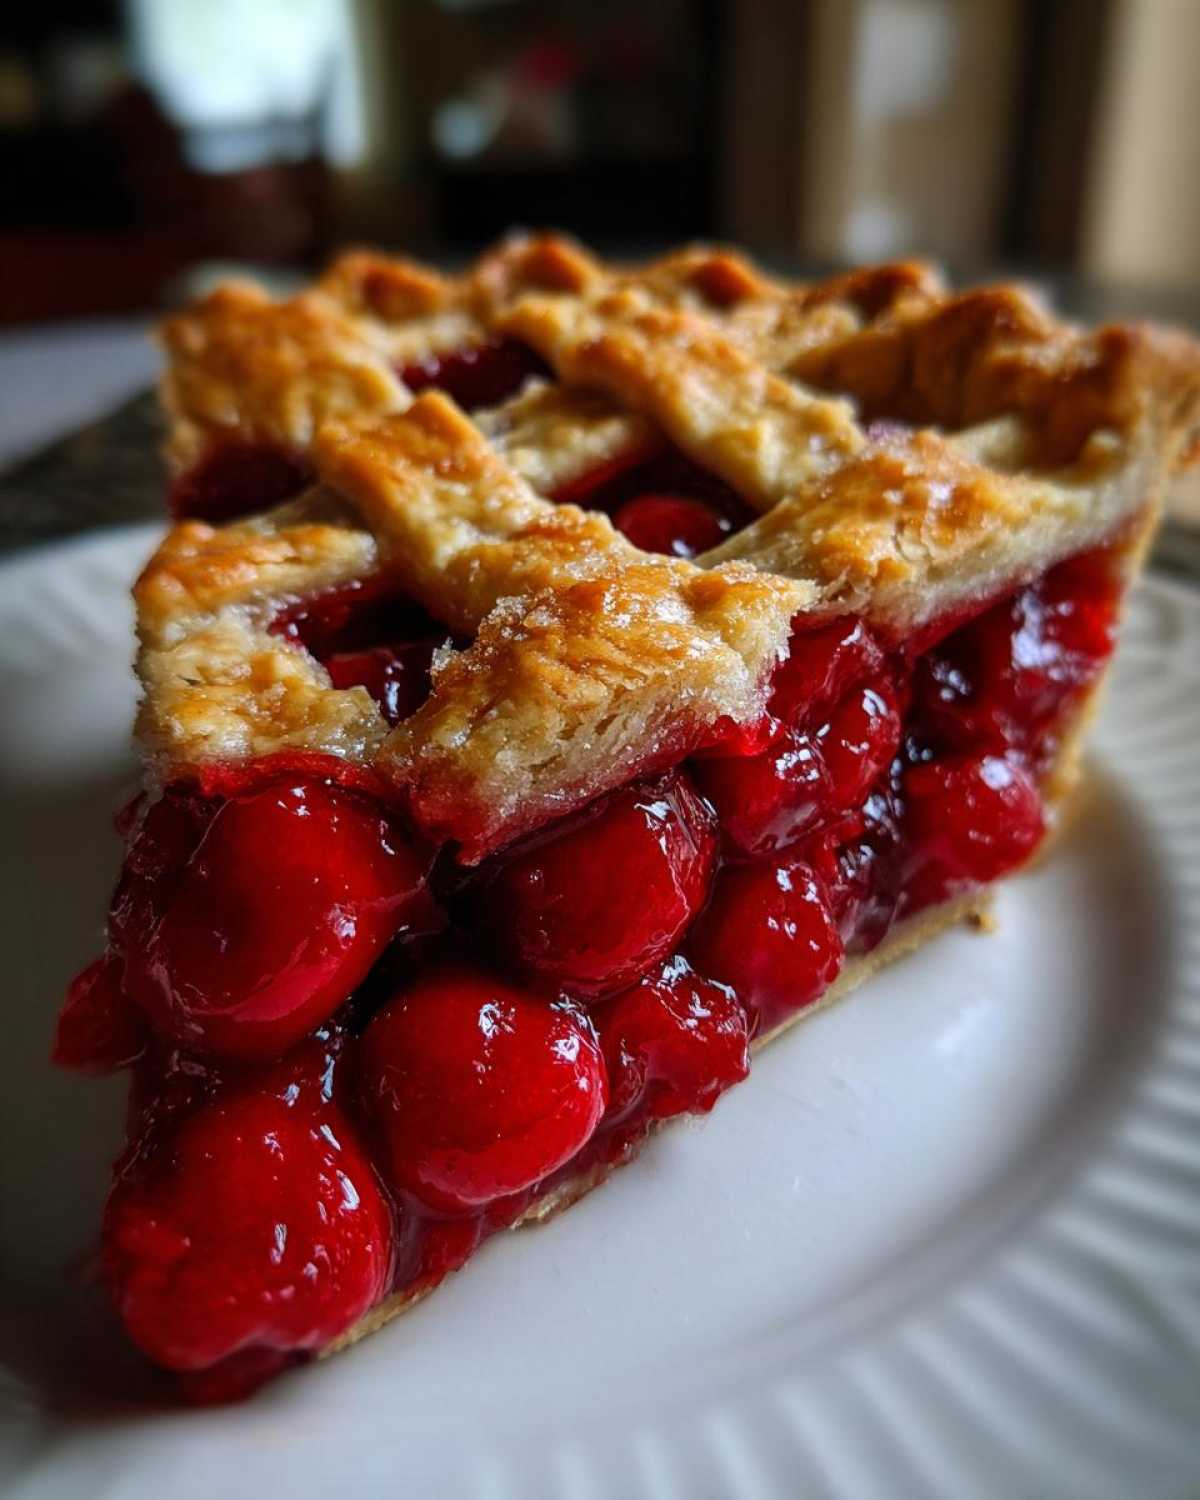
Now, put your second pie crust on top. You can make a pretty lattice top or just cut some slits in it. These slits let the steam escape while it bakes. This stops the crust from puffing up too much.
Crimp the edges of the two crusts together to seal everything in. I like to use a fork for a classic look.
Baking Your Classic Summer Pie
Brush the top crust with the beaten egg. This gives it that gorgeous golden shine. Sprinkle the remaining sugar over the top. It adds a little sweet crunch.
Put the pie on a baking sheet. This catches any filling that might bubble over. Bake at 400°F (200°C) for 20 minutes.
Then, turn the oven down to 375°F (190°C). Keep baking for another 30-40 minutes. The crust should be golden brown and the filling should be bubbly. If the edges brown too fast, cover them loosely with foil.
Cooling Your Homemade Cherry Pie (Classic Summer Pie)
This part is the hardest! You absolutely must let the pie cool completely. Put it on a wire rack. This lets air circulate all around it. Cooling lets the filling set up properly. Cutting into a warm pie might mean a runny mess. Trust me, the wait is worth it!
Tips for Homemade Cherry Pie Success
Making the perfect homemade cherry pie is easy with a few simple tricks. Picking the right cherries makes a big difference. I find a mix of sweet and tart cherries gives the best flavor balance for this classic summer pie.
To avoid a runny filling, make sure you drain thawed frozen cherries well. Also, don’t skimp on the cornstarch; it’s key to a nice, thick filling.
Getting that beautiful golden crust is all about watching it bake. If the edges start to brown too fast, just loosely wrap them with a bit of aluminum foil. This protects them while the rest of the pie bakes through.
Variations for Your Classic Summer Pie
While this homemade cherry pie is wonderful as is, you can totally play around with it! That’s part of the fun of a classic summer pie.
Try adding a pinch of cinnamon or a tiny bit of grated nutmeg to the filling. It adds warmth. A splash of bourbon or a little bit of orange zest can also give it a fun twist. Don’t be afraid to experiment and make this homemade cherry pie your own!
Serving Suggestions for Homemade Cherry Pie
Now that your beautiful homemade cherry pie is cooled and ready, it’s time to enjoy it! This classic summer pie is perfect on its own, but I love adding something extra.
A scoop of good quality vanilla ice cream is a must in my book. The cold creaminess with the warm pie is just divine. Freshly whipped cream is another fantastic option. It adds a lovely lightness.
Storing and Reheating Homemade Cherry Pie
If you happen to have any of this homemade cherry pie left (a rare occurrence in my house!), store it at room temperature for a day or two, covered loosely. For longer storage, keep it in the fridge. To reheat, just warm a slice in the oven at 350°F (175°C) for about 10-15 minutes until warm through. It brings back that freshly baked feel!
Frequently Asked Questions About Homemade Cherry Pie (Classic Summer Pie)
I get asked a few common things about making this homemade cherry pie. Here are some answers to help you make the best classic summer pie!
Can I use frozen cherries for Homemade Cherry Pie?
Absolutely, yes! Frozen cherries work great for this homemade cherry pie. Just make sure you thaw them completely first. Then, drain off all that extra liquid. This step is really important so your filling isn’t too watery inside the fruit pie.
Why is my Homemade Cherry Pie filling runny?
This is a common issue! A runny filling in a homemade pie usually happens if the cherries weren’t drained enough (especially if frozen) or if there wasn’t enough cornstarch used. Also, not letting the pie cool completely before cutting is a big reason. The filling needs time to set up as it cools.
How do I get a golden brown crust on my Classic Summer Pie?
Getting a beautiful golden crust on your classic summer pie is easy! Using an egg wash brushed over the top crust before baking helps a lot. The sugar sprinkled on top also helps with browning and adds a nice sparkle. If the edges start to brown too quickly, just loosely cover them with foil while the rest of the pie finishes baking.
Nutritional Information
Just a quick note about the nutrition for this homemade cherry pie. Providing exact numbers can be tricky! It really depends on the specific ingredients you use. Things like the type of pie crust, the amount of sugar, and even the cherries themselves can change the values.
So, please know that any nutritional info for this classic summer pie is just an estimate. It’s not a precise count. Think of it as a general idea!
Enjoy Your Baking Journey
There you have it! My go-to recipe for a perfect homemade cherry pie. I truly hope you give this classic summer pie a try. There’s nothing quite like the smell of it baking in your kitchen.
When you make it, please let me know how it turns out! I’d love to see your beautiful fruit pie creations. Happy baking!
Print
This **Homemade Cherry Pie** is a Sweet, Perfect 1 Slice of Joy
- Total Time: 2 hours
- Yield: 8 servings
Description
This is a classic homemade cherry pie, perfect for summer. It features a flaky crust and a sweet-tart cherry filling.
Ingredients
- 6 cups fresh or frozen cherries, pitted
- 3/4 cup granulated sugar
- 1/4 cup cornstarch
- 1 tablespoon lemon juice
- 1/2 teaspoon almond extract (optional)
- 2 pre-made pie crusts or ingredients for a double crust pie
- 2 tablespoons unsalted butter, cut into small pieces
- 1 large egg, beaten (for egg wash)
- 1 tablespoon granulated sugar (for sprinkling)
Instructions
- Preheat your oven to 400°F (200°C).
- If using frozen cherries, thaw them and drain any excess liquid.
- In a large bowl, combine the cherries, sugar, cornstarch, lemon juice, and almond extract (if using). Stir gently to coat the cherries evenly.
- Place one pie crust in the bottom of a 9-inch pie plate. Pour the cherry filling into the crust. Dot the top of the filling with the small pieces of butter.
- Place the second pie crust over the filling. You can create a lattice top or cut vents in the top crust.
- Crimp the edges of the pie crusts together to seal.
- Brush the top crust with the beaten egg wash and sprinkle with the remaining tablespoon of sugar.
- Place the pie on a baking sheet to catch any drips. Bake for 20 minutes.
- Reduce the oven temperature to 375°F (190°C) and continue baking for another 30-40 minutes, or until the crust is golden brown and the filling is bubbly. If the crust starts to brown too quickly, loosely cover the edges with aluminum foil.
- Let the pie cool completely on a wire rack before slicing and serving. This allows the filling to set properly.
Notes
- Using fresh, in-season cherries will give you the best flavor.
- You can use a mix of sweet and tart cherries for a more complex flavor.
- Ensure the pie is fully cooled before cutting to avoid a runny filling.
- Serve warm or at room temperature with a scoop of vanilla ice cream.
- Prep Time: 30 minutes
- Cook Time: 50-60 minutes
- Category: Dessert
- Method: Baking
- Cuisine: American
Nutrition
- Serving Size: 1 slice


Comments are closed.